A Guide to Extracting Plastic Wall Anchors
Table of Contents
- Introduction
- Understanding Plastic Screw Anchors: A Foundation of Fastening
- Pre-Removal Assessment: Planning for a Clean Extraction
- Step-by-Step Removal Techniques
- Post-Removal Wall Repair: Restoring a Professional Finish
- Sourcing Superior Components for Your Next Project
- Conclusion
- Frequently Asked Questions (FAQ)
Introduction
A project manager stands in a newly acquired commercial space, planning a complete refit. The walls are a patchwork of holes left from previous tenants—a testament to years of shelving, signage, and fixtures. Each of those small holes contains a stubborn plastic screw anchor, a tiny but significant obstacle to achieving a clean, professional finish. For MRO buyers, facility managers, and contractors, this scenario is all too common. Removing these anchors isn't just about aesthetics; it's about doing the job correctly, efficiently, and with minimal collateral damage to the wall surface, saving time and cost on subsequent repairs. This seemingly minor task is a microcosm of the broader challenges in maintenance and repair operations: the need for precision, the right tools, and a process that ensures a high-quality outcome.
This article provides a definitive, professional-grade guide on how to remove plastic screw anchors from various wall types, including drywall and plaster. We will move beyond simple DIY tricks to offer detailed, step-by-step techniques tailored for industrial and commercial settings. We’ll cover the pre-removal assessment, four distinct removal methods ranging from the simple to the surgical, and the critical post-removal repair process. The ultimate goal is to empower you with the knowledge to handle this task efficiently, preserving the integrity of your workspace and preparing it for what comes next—installing new, reliable hardware sourced from trusted manufacturers.
Understanding Plastic Screw Anchors: A Foundation of Fastening
Before we can effectively remove a plastic screw anchor, it's crucial to understand its design and function. These are not just simple plastic plugs; they are engineered components designed to expand and create a secure anchor point in materials that cannot support a screw on their own, such as drywall, hollow-core doors, or plaster. When a screw is driven into the anchor, it forces the anchor's sides to flare out behind the wall surface, creating a firm grip that can support significant weight.
The quality of the anchor itself plays a pivotal role in both its performance and its eventual removal. At Maden.co, we connect industrial buyers with a vast catalog of American-made products, and we understand that component integrity is non-negotiable. A low-quality, brittle anchor can crack during installation, fail under load, or shatter during removal, turning a simple task into a frustrating and costly repair job.
Common Types of Plastic Anchors
While there are many variations, most plastic anchors fall into a few primary categories, each with a specific design for different applications and load requirements.
- Ribbed Plastic Anchors: These are one of the most common types. The external ribs are designed to bite into the surrounding material (like drywall) to prevent the anchor from spinning as the screw is inserted. They provide excellent holding power for light to medium-duty applications. A well-designed ribbed plastic anchor made from high-quality nylon or plastic will expand uniformly without becoming brittle over time.
- Conical and Tapered Anchors: These anchors have a smooth or lightly ribbed, tapered body. The classic conical bantam plastic anchor is a versatile option for very light-duty applications in a variety of base materials. Their simple design makes them easy to install, but their holding power is generally less than that of a ribbed or winged anchor.
- Tapered and Ribbed Combo Anchors: Combining features of the two, anchors like this tapered and ribbed white plastic anchor offer a balance of easy insertion and solid anti-rotation grip. They are a reliable choice for general-purpose fastening in commercial and residential maintenance.
Understanding the type of anchor you're dealing with can inform your removal strategy. For example, the prominent ribs on some anchors can make them more difficult to pull out cleanly, sometimes requiring a more assertive technique. This is where sourcing components from a marketplace that values Industrial Excellence becomes a long-term strategy. When you choose quality from the start, you simplify the entire lifecycle of the component, from installation to eventual removal and replacement.
Pre-Removal Assessment: Planning for a Clean Extraction
Jumping straight into removal without a plan can lead to unnecessary wall damage. A few moments of assessment can save you significant time in the repair phase. This methodical approach is a hallmark of professional maintenance and repair operations.
Safety First
While removing a plastic anchor is a low-risk task, it's always prudent to wear safety glasses. Small pieces of plastic or drywall can become airborne, especially if you need to resort to drilling.
Identify the Wall Type
The material your wall is made from will dictate how much force you can apply and which method is most appropriate.
- Drywall (Gypsum Board): The most common interior wall material. It's relatively soft and can be easily damaged by aggressive prying. Gentle, steady pressure is key.
- Plaster: Found in older buildings, plaster is harder and more brittle than drywall. It's prone to cracking or chipping if you apply too much force or torque. The "screw and pull" method is often the safest bet here.
- Masonry (Brick or Concrete Block): Anchors in masonry are often held in by pure friction and can be very difficult to remove. In many cases, cutting them flush and patching over them is the most practical solution.
Assess the Anchor's Condition
Take a close look at the anchor you need to remove.
- Is it flush with the wall? This is the most common scenario.
- Is it protruding? This gives you an edge to grip with pliers.
- Is it recessed? This makes removal more challenging and may require pushing it through the wall.
- Is it damaged? If the head (flange) of the anchor is broken, you won't be able to grip it, likely necessitating the drilling method.
Gather the Right Tools
Having the correct tools on hand prevents you from improvising with something that could damage the wall. Your toolkit should include:
- Needle-nose pliers
- A selection of screws (various sizes)
- Screwdriver or drill
- Utility knife with a sharp blade
- Hammer (with a claw, if possible)
- Putty knife or a thin piece of cardboard (to protect the wall)
- Drill bits (slightly smaller than the anchor diameter)
- Safety glasses
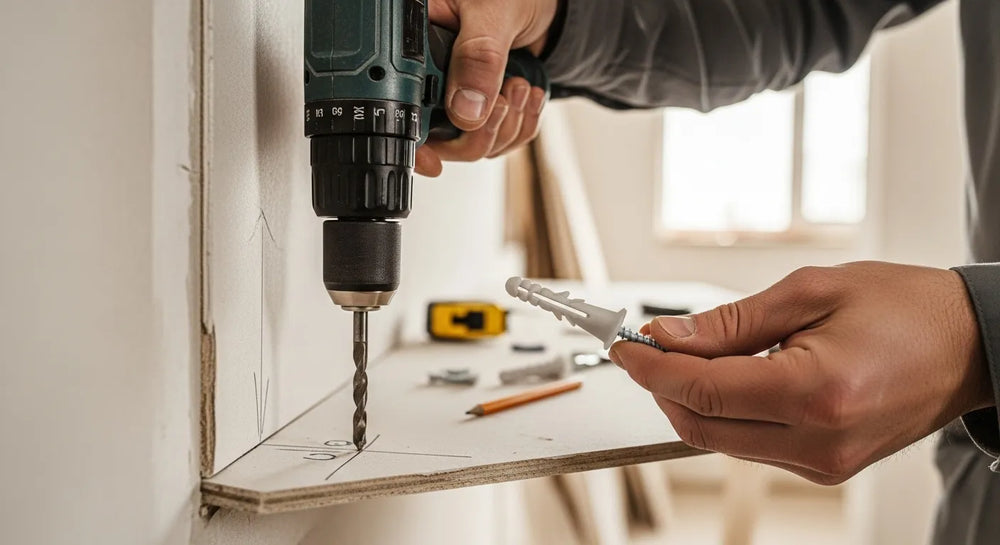
Step-by-Step Removal Techniques
Here are four proven methods for removing plastic screw anchors, ordered from the least to the most invasive. Always start with Method 1 and proceed to the others only if necessary.
Method 1: The Screw and Pull Technique (The Standard Approach)
This is the cleanest and most common method, ideal for anchors that are intact and flush with the wall. The principle is to partially re-engage the anchor with a screw to give you something to pull on.
- Select the Right Screw: Find a screw that is slightly larger than the original screw used in the anchor. You want it to bite firmly into the plastic without expanding the anchor further. A wood screw with coarse threads often works best.
- Insert the Screw: Using a screwdriver, turn the screw into the anchor. Only go in two or three full rotations. You need just enough grip to pull the anchor out; driving it all the way in will expand the anchor and lodge it even tighter.
- Grip and Pull: Firmly grip the head of the screw with a pair of needle-nose pliers or the claw of a hammer.
- Extract the Anchor: Pull straight out with steady, even pressure. Avoid yanking. You can gently wiggle the screw back and forth to help loosen the anchor's grip on the drywall paper and gypsum core. For extra leverage and to protect the wall, you can place the flat blade of a putty knife under the pliers or hammerhead.
Pro Tip: If the anchor starts to spin in its hole, you may have used too small of a screw. Try a slightly larger one to get a better bite on the plastic.
Method 2: The Pliers and Pry Technique (For Protruding Anchors)
If the flange or head of the anchor is already sticking out from the wall, you can often skip the screw and remove it directly.
- Get a Firm Grip: Use needle-nose pliers to grab the protruding edge of the plastic anchor. Ensure you have a solid hold.
- Protect the Wall: Slide a thin putty knife or a piece of sturdy cardboard between the pliers and the wall. This will act as a fulcrum and prevent the pliers from denting or scratching the drywall surface as you pry.
- Twist and Pry: Gently twist the anchor back and forth while pulling outwards. This motion can help break the friction holding the ribs in place. Use the putty knife as a lever point to slowly pry the anchor out of the wall. Be patient; slow and steady pressure is more effective and less damaging than a sudden jerk.
Method 3: The Drilling-Out Technique (For Stubborn or Broken Anchors)
Sometimes an anchor is simply stuck fast, or its head has broken off, leaving nothing to grip. In these cases, surgically destroying the anchor from within is the most effective solution.
- Choose Your Drill Bit: Select a drill bit that is slightly smaller than the diameter of the anchor's body. If you use a bit that's too large, you risk widening the hole in the wall, creating a bigger patch job.
- Center the Bit: Carefully place the tip of the drill bit in the exact center of the plastic anchor's screw hole.
- Drill Slowly: Set your drill to a low speed. Begin drilling into the anchor. The goal is not to drill through the wall but to chew up the plastic of the anchor itself. The plastic will break apart and spiral out along the drill bit's flutes.
- Clear Debris: Once you've drilled through the length of the anchor, it will be sufficiently weakened. You can often use the tip of a flathead screwdriver or the pliers to pull out the remaining fragments. A small vacuum can be useful for clearing any remaining plastic dust from the hole.
Method 4: The Cut and Push-In Technique (The Concealment Method)
In a high-volume MRO environment where speed is critical and the wall will be patched and painted anyway, removing the anchor isn't always the most efficient option. Pushing it into the wall cavity is a fast and effective alternative that leaves a smaller, cleaner hole to patch.
- Clear the Anchor: If there is a screw in the anchor, remove it completely.
- Cut the Flange: Take a sharp utility knife and carefully slice off the flange of the anchor so it is perfectly flush with the wall surface. Hold the blade parallel to the wall and make several shallow passes rather than one deep cut to avoid slipping and damaging the wall.
- Recess the Anchor: Place the tip of a Phillips head screwdriver, a nail set, or even a closed ballpoint pen on the remaining part of the anchor.
- Tap it Through: Gently tap the end of your tool with a hammer. This will push the body of the anchor through the drywall and into the hollow wall cavity behind it, where it will fall harmlessly away. You are left with a small, perfectly round hole that is very easy to patch.
Post-Removal Wall Repair: Restoring a Professional Finish
Removing the anchor is only half the job. A professional finish requires proper patching and preparation for the next installation.
- Clean the Area: Use the utility knife to trim away any loose paper or frayed drywall around the edge of the hole. Use a vacuum to remove any dust or debris from inside the hole.
- Apply Spackle or Joint Compound: For a small anchor hole, a lightweight spackling compound is sufficient. Use a flexible putty knife to press the compound firmly into the hole. Apply slightly more than needed to account for shrinkage as it dries.
- Smooth the Surface: Scrape the putty knife over the repair at a 45-degree angle to leave a smooth, flat surface that is flush with the surrounding wall. Let it dry completely according to the manufacturer's instructions. A second coat may be necessary if the first one shrinks significantly.
- Sand the Patch: Once fully cured, lightly sand the patched area with fine-grit sandpaper (220-grit is ideal) until it is perfectly smooth and blended with the wall texture.
- Prime and Paint: Apply a coat of primer over the patch to seal it and ensure the final paint coat has a uniform finish. Once the primer is dry, apply your matching wall paint.
This meticulous repair process reflects a commitment to quality that is central to our philosophy. Our entire business model is built on this principle; you can learn more about our mission to champion American manufacturing here.
Sourcing Superior Components for Your Next Project
With the old, problematic anchor removed and the wall perfectly repaired, the focus shifts to the next installation. This is a critical opportunity to upgrade your components and prevent future issues. The reliability of your next project starts with the quality of the fasteners you choose. For a procurement manager under pressure to source a specific component, a design engineer needing material certifications, or an MRO buyer facing an unexpected breakdown, the ability to quickly find and finance a verified, U.S.-made part is a game-changer.
At Maden.co, we are democratizing access to American manufacturing. Our platform connects you with over 2.5 million products from a network of more than 800 verified U.S. manufacturers. This ensures supply chain transparency and empowers you to source with confidence.
Whether your project requires a robust ribbed plastic anchor for a secure hold in commercial drywall or a versatile conical bantam plastic anchor for a range of light-duty tasks, our marketplace provides detailed specifications and direct access to manufacturers. By choosing high-quality, American-made components, you are not just buying a part; you are investing in reliability, reducing the Total Cost of Ownership (TCO), and contributing to the domestic industrial base. America's manufacturing revival is here, and it’s built on the foundation of superior parts like these.
For businesses looking to manage project expenses and cash flow, we offer a strategic advantage. You can apply for Instant Financing at checkout to streamline your capital-intensive projects, making it easier to procure the quality components you need, when you need them.
If you are a U.S. manufacturer producing high-quality industrial components, we invite you to join our mission. Register as a vendor and connect with thousands of industrial buyers who are actively seeking American-made products.
Conclusion
Mastering the removal of plastic screw anchors is a fundamental skill for any maintenance or facilities professional. By assessing the situation, choosing the right tools, and applying the correct technique—whether it's a gentle pull or a precise drill-out—you can execute the task cleanly and efficiently, minimizing damage and saving valuable time.
This process highlights a larger truth in the industrial world: quality and process matter. The effort you put into a clean removal and a professional repair pays dividends in the final result. Similarly, the effort you put into sourcing high-quality, reliable components for the installation that follows ensures longevity and performance. At Maden.co, we are your strategic partner in building a more resilient and efficient procurement process, giving you direct access to the very best of American manufacturing. Explore our catalog today to find the superior fasteners and MRO supplies for your next project, and leverage our checkout financing to make procurement seamless. If you have specific sourcing questions, our team is ready to help.
Frequently Asked Questions (FAQ)
1. What's the best method for removing a plastic anchor from a plaster wall? For plaster walls, which are more brittle than drywall, the least aggressive method is always best. The "Screw and Pull Technique" is the preferred approach. It's crucial to pull with slow, steady pressure and avoid wiggling the anchor excessively, as this can cause the plaster around the hole to crack and crumble. If you must pry, use a wide putty knife to distribute the pressure over a larger surface area.
2. Can I reuse a plastic wall anchor after removing it? It is strongly advised not to reuse a plastic wall anchor. The process of both installation (expansion) and removal (extraction) puts significant stress on the plastic. A removed anchor will have compromised structural integrity and will not provide the same holding strength or reliability as a new one. Given their low cost, it is always safer and more professional to use a new, high-quality anchor for any new installation.
3. What if the screw is broken off inside the plastic anchor? If a screw has sheared off deep inside the anchor, you have two primary options. The first and most effective is the "Drilling-Out Technique." You will drill through the center of the broken screw and the surrounding plastic, destroying both. The second option is the "Cut and Push-In Technique," where you use a nail set to punch the broken screw and anchor combination into the wall cavity, which is often faster if you plan to patch the hole anyway.
4. Why is it important to source U.S.-made anchors and fasteners? Sourcing U.S.-made anchors and fasteners from a trusted marketplace provides several critical business advantages. It ensures superior quality control and material traceability, meaning the component will perform as specified. It strengthens supply chain resilience by reducing dependence on overseas shipping and geopolitical disruptions. Finally, it supports the domestic economy and the ongoing revival of American manufacturing, fostering innovation and skilled labor here at home.


