Anchor Toilet Flange to Concrete Floor: A Pro's Guide
Table of Contents
- Introduction
- Understanding the "Why": The Importance of a Secure Toilet Flange
- Anatomy of the Connection: Key Components and Their Roles
- Essential Tools for the Job
- Preparing the Site: Laying the Groundwork for Success
- Step-by-Step Guide: Anchoring the Toilet Flange to Concrete
- Addressing Common Challenges and Best Practices
- The Maden.co Advantage: Sourcing for Industrial Excellence
- Streamlining Your Procurement with Instant Financing
- Conclusion
- Frequently Asked Questions (FAQ)
Introduction
In the intricate world of construction and facility maintenance, seemingly small details often hold the greatest significance. One such critical element, frequently underestimated until it fails, is the secure anchoring of a toilet flange to a concrete floor. A poorly anchored flange can lead to a cascade of costly problems: persistent leaks, unpleasant odors, rocking toilets, and eventually, expensive repairs involving subfloor damage. For procurement managers, MRO buyers, and design engineers, ensuring the foundational integrity of every installation, no matter how routine, is paramount. This post will delve into the essential techniques, materials, and best practices required to properly anchor a toilet flange to concrete, transforming a potential vulnerability into a rock-solid foundation. Our goal is to equip you with the knowledge to achieve a durable, leak-free, and stable toilet installation, emphasizing the strategic advantage of high-quality, American-made components.
Understanding the "Why": The Importance of a Secure Toilet Flange
The toilet flange is more than just a piece of plastic or metal that connects the toilet to the drainpipe; it is the critical interface that ensures the stability of the entire fixture and, crucially, maintains a watertight and airtight seal. When a toilet flange is not securely anchored to the concrete floor, several issues can arise:
- Toilet Rocking and Instability: This is perhaps the most immediate and noticeable problem. A rocking toilet is not only annoying but also places undue stress on the plumbing connections, particularly the wax ring or foam seal.
- Compromised Seal and Leaks: The primary function of the wax ring or foam gasket is to create a watertight and airtight seal between the toilet bowl and the flange. If the flange itself is not firmly held against the floor, any movement of the toilet can break this seal, leading to leaks. These leaks, often hidden, can cause significant damage to the concrete subfloor over time, promoting mold growth and structural decay, necessitating extensive repairs.
- Odor Emission: Beyond water leaks, a broken seal allows sewer gases to escape into the facility, creating unpleasant and unhygienic conditions.
- Fixture Damage: Continuous rocking and instability can stress the ceramic of the toilet bowl, potentially leading to cracks or breaks, requiring complete fixture replacement.
- Compliance and Longevity: In commercial or industrial settings, longevity and adherence to safety and plumbing codes are non-negotiable. A properly anchored flange contributes directly to the long-term reliability and compliance of the plumbing system, reducing the frequency of maintenance interventions and extending the operational lifespan of the installation.
For professionals focused on Total Cost of Ownership (TCO), understanding that a few extra minutes and the right quality components invested in proper anchoring can save thousands in future repairs and downtime is a critical insight.
Anatomy of the Connection: Key Components and Their Roles
A successful toilet flange installation is a symphony of several interdependent components, each playing a vital role. Understanding these parts is the first step toward a robust and lasting connection.
Toilet Flange
The flange itself is typically made of PVC, ABS plastic, or cast iron, with a metal ring (often stainless steel or brass) that provides the anchoring points. Its design is crucial:
- Body: Connects directly to the drainpipe.
- Ring: Features slots or holes for the toilet bolts that secure the toilet bowl and additional holes for anchoring the flange to the floor.
- Material: The choice of material should consider the drainpipe material (PVC to PVC, ABS to ABS for solvent welding) and the environment's corrosive potential.
Toilet Bolts (Closet Bolts)
These are specific bolts designed to secure the toilet bowl to the flange. They typically slide into slots on the flange ring, allowing for some adjustment. Quality here is key; inferior bolts can corrode, making future toilet removal difficult or causing the toilet to loosen. Sourcing American-made, corrosion-resistant toilet bolts ensures long-term integrity, a commitment upheld by the array of industrial supplies available on Maden.co.
Anchoring Hardware: The Foundation of Stability
This is where the direct connection to the concrete floor is made, and the selection of appropriate hardware is paramount.
Concrete Anchors
The type of concrete anchor used is critical for a secure hold. Different applications and concrete conditions might call for different anchor types:
- Wedge Anchors: These are heavy-duty, through-fastening anchors designed for solid concrete. Once inserted into a pre-drilled hole, tightening the nut pulls the wedge clip against the concrete, creating an expansion force that provides exceptional holding power. They are known for their strength and reliability.
- Sleeve Anchors: Similar to wedge anchors but designed for a broader range of base materials, including concrete, brick, and block. They consist of a bolt surrounded by an expandable sleeve. As the bolt is tightened, the tapered end expands the sleeve against the walls of the hole.
- Drop-in Anchors: These internally threaded anchors are ideal for applications where the anchor needs to be flush with the concrete surface. They are installed into a drilled hole and then expanded using a setting tool. They are particularly useful for applications where a threaded connection is needed, allowing for components to be attached and removed easily without disturbing the anchor itself. For applications requiring robust internal threading, such as securing a flange with machine screws, high-quality options like the BN Products 3/8 Inch Inside Thread Sanko Drop-In Concrete Anchor offer reliable performance in demanding concrete environments.
- Chemical/Epoxy Anchors: These involve injecting a two-part resin into a drilled hole, followed by inserting a threaded rod or rebar. The resin chemically bonds the rod to the concrete, creating an extremely strong, waterproof, and vibration-resistant connection. They are excellent for heavy loads or in situations where concrete might be compromised or irregular.
At Maden.co, our mission is to democratize access to American manufacturing, ensuring industrial buyers can readily find and source the precise, high-grade concrete anchors and fasteners required for mission-critical applications. Our network of over 800+ verified U.S. manufacturers provides access to over 2.5 million American-made products, reflecting our commitment to industrial excellence and supply chain transparency.
Washers & Nuts
For the flange-to-floor connection, robust washers (flat and sometimes lock washers) and nuts are essential to distribute the load evenly and prevent loosening over time. Material compatibility, especially in damp environments, is crucial to prevent corrosion. Stainless steel components are often preferred.
Shims
Concrete floors are rarely perfectly level. Specialized plastic or wax shims are used to level the flange and, later, the toilet bowl itself, ensuring a stable, wobble-free installation and preventing stress on the seal.
Sealant (Wax Ring or Foam Seal)
While not directly part of the anchoring system, the sealant between the toilet and the flange relies entirely on a stable, properly anchored flange to maintain its integrity. Choosing a high-quality wax ring (with or without a plastic horn) or a durable foam seal is an equally important aspect of a leak-free installation.
For a procurement manager under pressure to source a specific DIN or NPT compliant part, a design engineer needing material certifications for a new prototype, or an MRO buyer facing an unexpected equipment breakdown, the ability to quickly find and finance a verified, U.S.-made part is a game-changer. Maden.co serves as that strategic partner, offering unparalleled access to the components that uphold the highest standards of quality and resilience.
Essential Tools for the Job
Executing a precise and durable toilet flange anchoring requires the right toolkit. Attempting this job with inadequate tools can lead to frustration, compromised results, and potentially damage to materials.
- Hammer Drill and Masonry Bits: Absolutely indispensable for drilling into concrete. A standard drill will struggle and wear out quickly. Masonry bits, specifically designed for concrete, must match the diameter of your chosen concrete anchors.
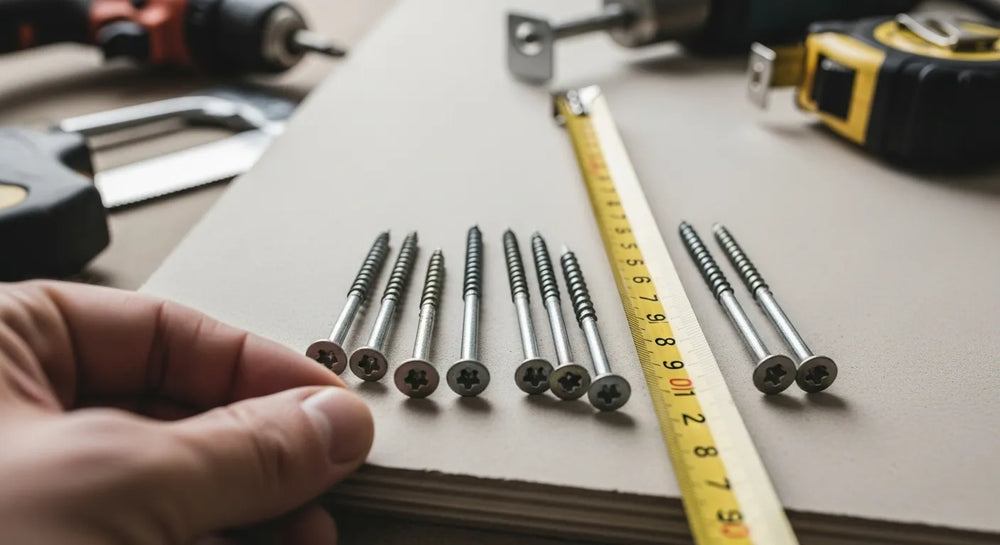
- Measuring Tape and Marker: For precise placement and marking of anchor points.
- Level: Crucial for ensuring the flange is installed perfectly level, which directly impacts the toilet's stability.
- Wrenches (Socket, Adjustable): To tighten the nuts on the concrete anchors and, later, the toilet bolts. A torque wrench might be advisable for critical applications to ensure fasteners are tightened to manufacturer specifications without over-tightening.
- Cleaning Tools (Vacuum, Brush): Essential for thoroughly cleaning drilled holes of concrete dust, which is critical for the proper function of any concrete anchor.
- Caulk Gun (for Chemical Anchors): If using epoxy-based chemical anchors, a sturdy caulk gun is needed to dispense the two-part resin.
- Setting Tool (for Drop-in Anchors): A specific tool is required to properly expand drop-in anchors in the concrete.
- Safety Gear (PPE): Safety glasses, hearing protection (especially for hammer drilling), and gloves are non-negotiable for personal protection during this task.
Having access to high-quality, reliable tools is as important as the fasteners themselves. Maden.co, through our commitment to Industrial Excellence, connects you with the U.S. manufacturers producing the durable tools and equipment that professionals rely on.
Preparing the Site: Laying the Groundwork for Success
Before any drilling or anchoring begins, thorough site preparation is vital. This phase ensures a clean, level, and ready surface, minimizing complications down the line.
Removing the Old Toilet (if applicable)
If replacing an existing toilet, this step is critical:
- Shut off the water supply: Locate the shut-off valve behind or near the toilet and turn it clockwise until the water flow stops.
- Flush the toilet: Flush to drain as much water from the tank and bowl as possible.
- Remove remaining water: Use a sponge or shop vac to remove any standing water from the tank and bowl.
- Disconnect the supply line: Use a wrench to disconnect the water supply line from the tank.
- Remove bolt caps and nuts: Pry off the decorative caps at the base of the toilet, then use a wrench to remove the nuts securing the toilet to the closet bolts.
- Gently rock and lift: Carefully rock the toilet to break the old wax seal, then lift the toilet straight up and set it aside, preferably on old towels or newspapers, to contain any residual water.
- Scrape off old wax: Thoroughly scrape away all remnants of the old wax ring or seal from both the flange and the floor using a putty knife.
Assessing the Concrete Floor
With the old toilet and wax ring removed, inspect the concrete subfloor:
- Flatness: Use a level to check for any significant high or low spots around the drain opening. An uneven surface will necessitate shimming the flange or, if severe, leveling the concrete.
- Existing Damage: Look for cracks, spalling, or crumbling concrete around the drain. These issues can compromise anchor integrity and must be addressed before proceeding. Epoxy fillers or concrete patching compounds may be required.
- Drainpipe Position: Ensure the drainpipe is cut flush with the concrete surface or slightly below it, allowing the new flange to sit properly.
Cleaning the Area
A meticulously clean work area is crucial:
- Remove all debris, dust, and old wax residue. A shop vacuum is highly effective for this.
- Ensure the area is dry. Any moisture can affect anchor performance, especially with chemical anchors.
Dry Fitting the Flange
This is a critical preliminary step:
- Place the new toilet flange over the drainpipe, ensuring its mounting slots align with where your toilet bolts will eventually sit.
- Rotate the flange so that the toilet bolt slots are perpendicular to the wall behind the toilet, or as needed for the specific toilet model.
- Use a marker or pencil to accurately mark the locations where the flange's anchoring holes align with the concrete floor. These marks will guide your drilling.
This meticulous preparation minimizes errors and ensures that the subsequent steps of drilling and anchoring proceed smoothly, laying a strong foundation for the entire installation.
Step-by-Step Guide: Anchoring the Toilet Flange to Concrete
With the site prepared, we can now proceed to the precise steps of anchoring the toilet flange. Precision at each stage is vital for a secure and lasting installation.
Step 1: Marking Anchor Points
Referring back to your dry-fit and the marks you made, double-check the alignment. For most flanges, you'll have 3-4 holes around the perimeter where screws or bolts will secure it to the floor. Confirm these marks are clear and accurately represent where the anchors need to be placed to hold the flange securely. This alignment is critical not just for the flange itself, but for the overall stability of the toilet once installed.
Step 2: Drilling Pilot Holes
This is where the hammer drill comes into play.
- Select the correct masonry bit: The bit diameter must match the size of your chosen concrete anchors. Consult the anchor manufacturer's specifications for the exact drill bit size required.
- Mark the drill bit depth: Many anchors require a specific embedment depth. Use a piece of tape on your drill bit to mark the required depth, or utilize a depth stop if your hammer drill has one. Drill slightly deeper than the anchor's embedment depth to allow for dust accumulation without bottoming out the anchor.
- Drill with confidence: Position the hammer drill squarely over each marked point. Apply steady, firm pressure and allow the hammer action to do the work. Avoid forcing the drill. For multiple holes, take short breaks to prevent the drill bit from overheating.
When precision and durability are paramount, especially for industrial applications, sourcing specialized tooling like a 1-Headed Concrete Anchor Shear Connector Chuck can make a significant difference in drilling efficiency and anchor seating accuracy. For comprehensive projects that require versatility, a Concrete Anchor Shear Connector Chuck Set ensures that you have the appropriate tool for various anchor sizes and tasks, providing reliable performance that only American-made components can guarantee.
Step 3: Cleaning the Holes
This step is often overlooked but is absolutely critical for anchor performance. Concrete dust left in the drilled hole can drastically reduce an anchor's holding power, whether mechanical or chemical.
- Use a shop vacuum to thoroughly suck out all dust and debris from each hole.
- Follow up with a stiff brush to dislodge any stubbornly clinging particles.
- For optimal results with mechanical anchors, and almost mandatory for chemical anchors, use compressed air (while wearing safety glasses) to blow out the last remnants of dust, then vacuum again.
Step 4: Installing the Concrete Anchors
The method here depends on the type of anchor you've chosen:
-
Mechanical Anchors (Wedge or Sleeve):
- Insert the anchor fully into the cleaned hole. For sleeve anchors, the nut and washer should be on the anchor before insertion.
- Once fully seated, tighten the nut with a wrench. As you tighten, the anchor will expand and grip the concrete. Do not over-tighten, as this can crack the concrete or strip the threads. Tighten until snug and secure.
-
Drop-in Anchors:
- Insert the drop-in anchor into the hole until it is flush with the concrete surface.
- Place the specialized setting tool into the anchor's threaded opening.
- Strike the setting tool firmly with a hammer until the anchor is fully expanded and locked into the concrete. You will usually feel a solid resistance when it is properly set. For applications requiring robust internal threading, such as securing a flange with machine screws, high-quality options like the BN Products 3/8 Inch Inside Thread Sanko Drop-In Concrete Anchor offer reliable performance in demanding concrete environments.
-
Chemical/Epoxy Anchors:
- Prepare the two-part epoxy resin according to the manufacturer's instructions, typically by attaching a mixing nozzle to a caulk gun.
- Dispense a small amount of resin until it's consistently mixed (color change).
- Inject the resin into the cleaned hole, starting from the bottom, filling it about two-thirds full.
- Immediately insert the threaded rod or fastener into the resin, rotating it slightly to ensure full coverage.
- Allow the epoxy to cure completely according to the manufacturer's specified time before applying any load. Cure times vary significantly with temperature.
Step 5: Securing the Flange
With the concrete anchors firmly in place:
- Position the Flange: Carefully place the toilet flange over the drainpipe, aligning its mounting holes with the installed concrete anchors.
- Apply Fasteners: Insert the appropriate screws or machine bolts through the flange's mounting holes and into the concrete anchors. If using drop-in anchors, these will be machine screws or bolts that thread into the anchor. For wedge or sleeve anchors, you might use nuts and washers directly on the anchor's stud.
- Level and Shim: As you begin to tighten the fasteners, use your level to check the flange for true levelness. If there are gaps or an uneven surface, strategically place shims underneath the flange to achieve a perfectly level and stable base. Use multiple shims if necessary to distribute the load evenly.
- Tighten Evenly: Tighten the fasteners gradually and evenly, moving from one side to another. This prevents warping or cracking of the flange and ensures consistent pressure on the shims and concrete. Do not over-tighten; the goal is snug and secure, not extreme compression.
At Maden.co, we emphasize that quality begins with the components. Our platform connects industrial buyers with over 2.5 million American-made products, ensuring that every fastener, anchor, and tool used in your projects meets the highest standards of American Manufacturing Pride and Industrial Excellence. Our vision is to become the definitive platform that proves American-made components are as accessible and convenient as any global alternative, driving the manufacturing revival with our tagline: "America's manufacturing revival is here." You can learn more about our mission to champion American manufacturing and industrial excellence here: About Us.
Addressing Common Challenges and Best Practices
Even with the most meticulous planning, unexpected issues can arise. Knowing how to troubleshoot common challenges and adhering to best practices ensures a successful outcome and long-term reliability.
Cracked Concrete
Finding cracks or spalling around the drain opening is a common issue, especially in older installations or where previous repairs were faulty.
- Minor Cracks: Small, hairline cracks can often be mitigated by using chemical anchors, as the epoxy fills the voids and bonds directly to the concrete.
- Larger Damage/Spalling: For more significant damage, the concrete may need to be repaired before anchoring. This involves chiseling away loose concrete, cleaning the area thoroughly, and patching with a high-strength, fast-setting concrete repair compound or epoxy mortar. Allow ample cure time before drilling into the patched area.
Uneven Floor
A non-level concrete floor is another frequent obstacle.
- Strategic Shimming: As mentioned in Step 5, shims are your best friend here. Use plastic or composite shims (wax shims are typically for the toilet bowl itself, not the flange). Insert them under the flange at the low spots until the flange is perfectly level. Ensure the shims are robust enough to support the flange without compressing over time.
- Self-Leveling Compound: For severely uneven floors, applying a self-leveling concrete compound to the entire area around the drain might be necessary before installing the flange. This provides a truly flat surface to work with.
Stripped Anchor Holes
If an anchor hole becomes stripped (e.g., a mechanical anchor spun out or a drop-in anchor pulled out), you have a few options:
- Oversize Anchor: Drill out the existing hole to a larger diameter and install a larger anchor (if the flange's mounting holes allow).
- Chemical Anchor Conversion: This is often the most reliable solution for stripped holes. Clean the hole thoroughly, inject chemical epoxy, and insert a new threaded rod or anchor bolt. The epoxy will fill the damaged area and create a new, strong bond.
- Relocate Anchor Point: If possible, slightly offset the drilling location (e.g., a few inches away) and drill a new hole for a fresh anchor. This requires careful assessment of the flange's mounting slots and overall stability.
Over-tightening
The temptation to over-tighten fasteners "just to be sure" can be detrimental.
- Cracked Flange: Plastic flanges can crack under excessive torque, compromising their integrity.
- Cracked Concrete: Over-tightening can cause the concrete around the anchor to spall or crack, leading to anchor failure.
- Stripped Threads: Both the anchor's internal threads (for drop-ins) or the bolt's threads can strip, rendering the connection useless.
- Best Practice: Tighten fasteners until they are snug and secure, then give them a quarter-turn more. For critical applications, consult anchor manufacturer torque specifications and use a torque wrench.
Material Compatibility
In plumbing, especially in areas exposed to moisture, material compatibility is key to preventing corrosion and ensuring longevity.
- Corrosion Resistance: Opt for stainless steel fasteners (screws, bolts, washers, nuts) for securing the flange to concrete and the toilet to the flange. Zinc-plated or standard steel fasteners will eventually corrode in a damp environment, weakening the connection and potentially causing rust stains.
- Flange Material: Ensure the flange material (PVC, ABS, cast iron) is compatible with your drainpipe and local plumbing codes.
Compliance & Standards
For industrial and commercial procurement, adherence to standards (like DIN for fasteners or NPT for pipe threads in other plumbing components) is crucial. While direct standards for toilet flange anchoring might be regional, the principle of using high-quality, specified components applies. Maden.co is built on values of Digital Innovation and Supply Chain Transparency, connecting you with verified U.S. manufacturers who often produce components compliant with rigorous industry standards, ensuring peace of mind for design engineers and MRO buyers. This focus on verifiable quality enhances supply chain resilience and reduces procurement friction for all our users.
The Maden.co Advantage: Sourcing for Industrial Excellence
At Maden.co, we understand that for procurement managers, MRO buyers, and design engineers, every component, no matter how small, plays a role in the integrity and longevity of an installation. Our platform is not just a marketplace; it is a strategic partner in building a more reliable and efficient procurement process.
Our core mission is to democratize access to American manufacturing. We achieve this by connecting industrial buyers with an unparalleled network of over 800+ verified U.S. manufacturers, offering access to more than 2.5 million American-made products. This vast catalog ensures that whether you need standard fasteners, specialized concrete anchors, or precision-machined parts, you can find them with ease and confidence.
We stand by our core values:
- American Manufacturing Pride: We believe in the quality, durability, and innovation inherent in U.S.-made products. Sourcing through Maden.co means investing in superior craftsmanship and supporting domestic industry.
- Digital Innovation: Our platform is designed for efficiency, offering intuitive search, detailed product specifications, and a streamlined purchasing experience.
- Supply Chain Transparency: We connect you directly with verified manufacturers, providing clear visibility into product origins and certifications, which is critical for compliance and risk management.
- Industrial Excellence: We are committed to fostering the highest standards in industrial supply, ensuring that every product listed meets rigorous quality benchmarks.
- Customer Empowerment: We empower buyers with choice, information, and control over their procurement process, enabling smarter, more strategic purchasing decisions.
Consider this: For a procurement manager overseeing critical infrastructure projects, an MRO buyer needing a specific anchor for urgent facility maintenance, or a design engineer specifying components for a new build, the ability to quickly source and verify U.S.-made parts through Maden.co is invaluable. Our platform significantly reduces procurement friction, enhances supply chain resilience against global disruptions, and ensures adherence to the highest standards. We eliminate the guesswork, providing a trusted source for components that improve your Total Cost of Ownership (TCO) by reducing failures and extending service life.
From the simplest screw to complex custom parts, our marketplace is designed to be your go-to source for reliable, American-made industrial supplies. Explore the depth and breadth of the Maden.co marketplace for your industrial supply needs: Maden.co.
Streamlining Your Procurement with Instant Financing
In today's dynamic business environment, effective cash flow management is as crucial as product quality. That's why Maden.co offers a key differentiator: Instant Financing. This feature is not merely a payment option; it's a strategic tool designed to empower businesses, especially procurement managers and business owners, to manage their capital effectively and make necessary investments without compromising liquidity.
Instant Financing allows you to make larger-volume purchases or acquire critical components without tying up immediate working capital. This means projects can proceed on schedule, equipment can be repaired or upgraded promptly, and inventory can be optimized, all while preserving your cash flow. The convenience of applying for Instant Financing is seamlessly integrated into the checkout process on our platform, making it an accessible solution when you need it most.
Imagine an MRO buyer needing to purchase a significant quantity of specialized concrete anchors for a large facility upgrade. With Instant Financing, they can secure these essential, U.S.-made components immediately, knowing that their payment terms are structured to support their operational budget. This capability is particularly beneficial for capital-intensive projects, emergency repairs, or when taking advantage of bulk pricing for American-made excellence. You can apply for Instant Financing at checkout to streamline your capital-intensive projects and ensure your operations never miss a beat.
Conclusion
The secure anchoring of a toilet flange to a concrete floor, while seemingly a minor detail in the grand scheme of industrial operations, is a foundational element that dictates the long-term reliability and integrity of a facility's plumbing infrastructure. Neglecting proper technique or using substandard components inevitably leads to costly repairs, operational disruptions, and compromised hygiene. By understanding the critical role of each component, preparing the site meticulously, and executing each step with precision, you ensure a durable, leak-free, and stable installation.
For procurement managers, MRO buyers, and design engineers dedicated to optimizing TCO, enhancing supply chain resilience, and upholding the highest standards of industrial excellence, the choice of supplier and component quality is paramount. Maden.co stands as America's premier B2B marketplace for U.S.-manufactured products, championing American Manufacturing Pride and providing unparalleled access to the verified, high-quality components you need. From specialized concrete anchors like the BN Products 3/8 Inch Inside Thread Sanko Drop-In Concrete Anchor to robust tooling such as the Concrete Anchor Shear Connector Chuck Set or the precise 1-Headed Concrete Anchor Shear Connector Chuck, our platform offers the strategic advantage of sourcing everything Made in the U.S.A.
We encourage you to explore the extensive Maden.co catalog for all your industrial supply needs. Leverage our digital innovation and transparent supply chain to find exactly what you need, when you need it. And for those larger projects or critical procurements, remember that you can apply for Instant Financing at checkout to manage cash flow effectively and ensure your operations continue uninterrupted. America's manufacturing revival is here, and we invite you to be a part of it. Are you a U.S. manufacturer looking to expand your reach? Register as a vendor and join the American manufacturing revival. If you have specific sourcing questions, our team is ready to help: Contact Us.
Frequently Asked Questions (FAQ)
Q1: What type of concrete anchor is best for a toilet flange? A1: The best type depends on the specific conditions. Drop-in anchors are excellent for flush mounting and when internal threading is preferred, allowing for easy removal and reattachment of the flange. Wedge or sleeve anchors provide very strong mechanical expansion and are suitable for solid concrete. Chemical (epoxy) anchors are ideal for damaged concrete or when maximum holding power and vibration resistance are required. For standard installations, stainless steel drop-in anchors are a popular and reliable choice.
Q2: How deep should I drill holes for concrete anchors? A2: Always consult the concrete anchor manufacturer's specifications for the exact drilling depth. Generally, you should drill the hole slightly deeper (typically 1/4 to 1/2 inch) than the anchor's specified embedment depth. This extra depth allows for any concrete dust or debris that couldn't be fully removed, preventing the anchor from bottoming out before it's properly seated.
Q3: Can I anchor a toilet flange to concrete without a hammer drill? A3: While it's technically possible to drill into concrete with a standard drill and a masonry bit, it is highly discouraged. A hammer drill is specifically designed with a percussive action that breaks up the concrete while rotating, making the job significantly faster, easier, and resulting in cleaner, more accurate holes. Using a standard drill risks overheating the drill, dulling bits quickly, and producing an inferior, inconsistent hole that compromises anchor performance.
Q4: What if the concrete around the drain is damaged or uneven? A4: If the concrete is severely damaged (cracked, spalled), it must be repaired before anchoring. This typically involves removing loose material and patching with a high-strength concrete repair compound or epoxy mortar, allowing it to cure fully. For uneven surfaces, shims should be used under the flange to achieve a perfectly level installation. For significant height differences, a self-leveling concrete compound might be necessary over the entire area.


