How Do You Install Anchors Into Drywall? A Pro Guide
Table of Contents
- Introduction
- Why Drywall Anchors Are Non-Negotiable in Professional Settings
- A Buyer's Guide: Selecting the Right Drywall Anchor for the Job
- The Professional's Step-by-Step Installation Process
- Sourcing with Confidence: The Maden.co Advantage for Industrial Buyers
- Conclusion
- Frequently Asked Questions (FAQ)
Introduction
A maintenance manager gets an urgent call: a critical piece of monitoring equipment, improperly mounted, has fallen from a factory wall, causing a minor production delay and a major safety concern. It wasn't the equipment that failed, but the single, inadequate screw pulled directly from the gypsum board. This scenario, all too common in industrial and commercial settings, highlights a fundamental truth: the integrity of any wall-mounted fixture is only as strong as its connection to the wall itself. For drywall, that connection almost always requires a specialized anchor.
This is not just a matter of hanging a picture; for MRO buyers, facilities managers, and design engineers, selecting and installing the correct fastener is a decision that impacts safety, operational uptime, and long-term reliability. Understanding how to properly install anchors into drywall is a core competency that prevents costly rework, equipment damage, and potential workplace accidents.
This article provides a definitive, professional-level guide to drywall anchors. We will move beyond basic DIY tips to deliver the technical understanding industrial buyers need. We’ll explore the different classes of anchors, detail a meticulous step-by-step installation process, identify common points of failure, and explain how sourcing high-quality, American-made components is a strategic decision that underpins operational excellence. The goal is to empower you with the knowledge to ensure every installation is secure, compliant, and built to last.
Why Drywall Anchors Are Non-Negotiable in Professional Settings
Drywall, or gypsum board, is a ubiquitous building material prized for its cost-effectiveness and ease of installation. However, its core structural characteristic is also its greatest weakness: it has very low shear and pull-out strength. Composed of a soft gypsum plaster core pressed between sheets of paper, drywall simply cannot hold the threads of a screw under any significant load. Driving a screw directly into drywall is an invitation for failure.
The Physics of Failure: Understanding Load Distribution
When you hang an object on a screw driven into drywall, all the force—both the static weight (dead load) and any dynamic forces (vibrations, accidental bumps)—is concentrated on the fragile, crumbly gypsum immediately surrounding the screw threads. The material quickly gives way, the hole widens, and the screw pulls out.
A drywall anchor fundamentally changes this dynamic. It works by distributing the load over a much larger surface area. It achieves this in one of two ways:
- Expansion: The anchor expands within or behind the drywall, creating immense friction and pressure against the interior of the wall. This radial force prevents the anchor from being pulled out.
- Bracing: The anchor deploys wings or a toggle bar behind the drywall, creating a solid brace that pulls against the back surface of the wall panel. The load is now spread across the solid rear face of the gypsum board.
The Professional Risks of Improper Mounting
In a commercial or industrial environment, the consequences of anchor failure extend far beyond a hole in the wall.
- Safety Hazards: Falling equipment, heavy shelving, or even fire extinguishers can cause serious injury to personnel. This creates significant liability and contravenes workplace safety standards.
- Equipment Damage: Sensitive electronics, control panels, and calibrated instruments can be destroyed by a fall, leading to expensive replacement costs and operational downtime.
- Costly Rework: A failed anchor often creates a large, damaged area of drywall that requires patching, sanding, and repainting. The labor and material costs for this repair, coupled with the need to reinstall the fixture correctly, far exceed the initial cost of using the proper anchor.
- Compliance Issues: In many regulated industries, fixtures like safety signage, emergency equipment, and data cabling conduits must be mounted according to specific codes that demand secure anchoring.
At its core, using the right hardware is a reflection of industrial excellence. It demonstrates a commitment to quality, safety, and long-term value over shortcuts. This aligns perfectly with our ethos at Maden.co, where we believe that building a resilient and efficient operation starts with sourcing reliable, high-quality components from verified U.S. manufacturers.
A Buyer's Guide: Selecting the Right Drywall Anchor for the Job
Choosing the correct anchor is the most critical step in the process. The decision should be based on three primary factors: the weight of the object you are mounting, the thickness of the drywall, and the type of load (static vs. dynamic). Let's break down the main categories of anchors available to procurement professionals.
Light-Duty Anchors: For Signage, Sensors, and Small Fixtures
These anchors are designed for objects typically weighing less than 15-20 pounds. They are ideal for applications where the load is static and minimal.
Ribbed Plastic Anchors (Expansion Anchors)
This is one of the most common types of anchors. A plastic, ribbed sleeve is inserted into a pre-drilled pilot hole. As a screw is driven into the sleeve, the anchor expands, and the ribs bite into the surrounding gypsum, creating a secure friction fit. They are cost-effective and simple to install.
- Best For: Lightweight signage, smoke detectors, thermostats, small control boxes, and securing wiring conduits.
- Considerations: Their holding power is limited and can degrade over time, especially if subjected to vibration. They are not suitable for ceiling applications. For a dependable, U.S.-made option, the Ribbed Plastic Anchor available on our marketplace provides consistent performance for your light-duty needs.
Medium-Duty Anchors: The Workhorses of MRO and Facilities
This category represents the most versatile and frequently used anchors in commercial settings, suitable for loads ranging from 20 to 50 pounds, depending on the specific design and wall condition.
Nylon Wall Anchors
While they may look similar to their plastic counterparts, nylon anchors offer significantly superior performance. Nylon is a more durable and resilient material that provides greater shear strength and resists becoming brittle over time. When the screw is inserted, the anchor splits and expands more aggressively, creating a stronger grip.
- Best For: Wall-mounted tool holders, first-aid kits, small shelves, display boards, and heavier commercial signage.
- Scenario: An MRO buyer for a large distribution center needs to install dozens of hand sanitizer dispensers throughout the facility. The dispensers will be subject to constant use. A standard plastic anchor might fail, but a high-quality Medium-Duty Nylon Wall Anchor ensures a secure, long-lasting installation that can withstand the rigors of a high-traffic environment.
Self-Drilling Anchors (Zip-It® Style)
For projects where installation speed is critical, self-drilling anchors are an exceptional choice. These anchors, often made of high-strength nylon or a zinc alloy, feature a sharp, aggressive point that allows them to be screwed directly into the drywall without a pilot hole. This dramatically reduces installation time.
- Best For: Rapid deployment of multiple fixtures, electrical outlet boxes, lightweight shelving, and general-purpose mounting where efficiency is paramount.
- Considerations: They create a slightly larger hole than expansion anchors. For procurement managers focused on reducing procurement friction and total installation time, the Medium-Duty Nylon Self-Drilling Drywall Anchor is a strategic choice that streamlines projects and reduces labor costs.
Heavy-Duty Anchors: For Critical and High-Load Applications
When mounting heavy objects (50+ pounds) or fixtures that are critical to safety or operations, you must use a heavy-duty anchor.
Toggle Bolts
The toggle bolt is a classic heavy-duty solution. It consists of a screw and a spring-loaded, wing-like mechanism (the toggle). A large hole is drilled to allow the folded toggle to pass through the drywall. Once behind the wall, the wings spring open. As the screw is tightened, it pulls the toggle tight against the back of the drywall, creating an extremely strong brace.
- Best For: Heavy shelving units, wall-mounted cabinets, grab bars, large monitors, and heavy-duty brackets.
- Considerations: They require a large hole, and if the screw is removed, the toggle will fall down inside the wall cavity, rendering it unusable for remounting.
Molly Bolts (Sleeve-Type Anchors)
A Molly bolt offers similar strength to a toggle bolt but with a more refined mechanism. It features a metal sleeve that is inserted into a pilot hole. As the bolt is tightened, the sleeve is compressed, causing it to expand and form legs that grip the back of the drywall. A key advantage is that once the anchor is set, the bolt can be removed and reinserted without losing the anchor in the wall.
- Best For: Applications requiring extreme strength and the potential need to remove the mounted item, such as heavy-duty wall-mounted equipment or support systems.
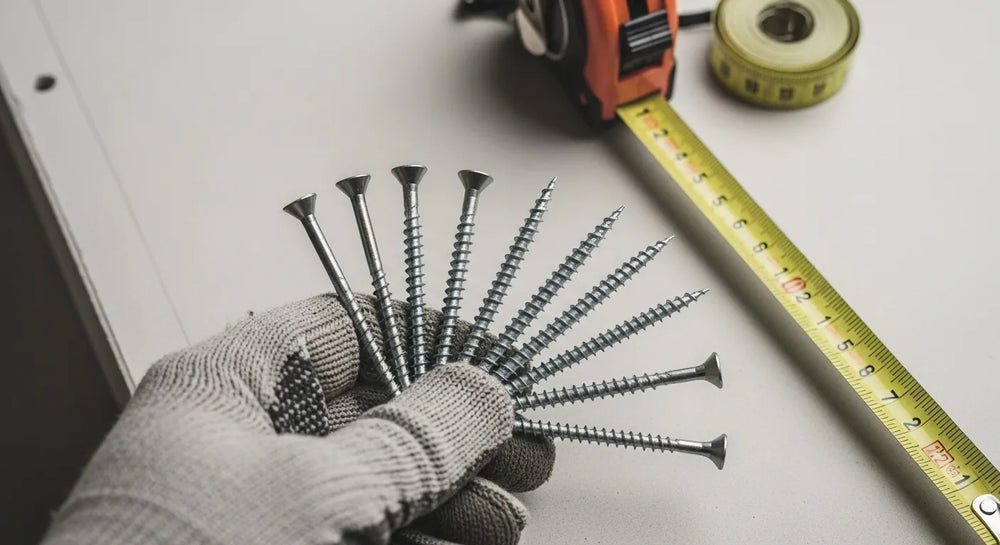
The Professional's Step-by-Step Installation Process
Executing a flawless installation requires precision and adherence to a clear process. Rushing this stage is what leads to the most common failures.
Step 1: Pre-Installation Checks & Tool Preparation
Before you drill, conduct a thorough assessment.
- Confirm Load Weight: Know the exact weight of the object you are mounting and select an anchor with a load rating that comfortably exceeds it. Always check the manufacturer's specifications.
- Locate Studs: Use a quality electronic stud finder. The strongest possible mounting point is always directly into a wooden stud. If a stud is available where you need to mount, use a long wood screw instead of a drywall anchor. If no stud is present, proceed with the anchor installation.
- Gather Your Tools: You will need a power drill, the correct size drill bit for your chosen anchor, a Phillips or flathead screwdriver (or driver bit for your drill), a tape measure, a level, and a pencil for marking.
Step 2: Drilling the Pilot Hole (For Non-Self-Drilling Anchors)
This is a step where precision is paramount.
Key Takeaway: The diameter of the pilot hole must match the manufacturer's specification for the anchor. A hole that is too small will damage the anchor upon insertion. A hole that is too large will prevent the anchor from gripping the drywall correctly, drastically reducing its holding power.
The required drill bit size is almost always printed on the anchor's packaging or specification sheet. When drilling, use firm, steady pressure and keep the drill perpendicular to the wall to create a clean, straight hole.
Step 3: Inserting the Anchor
For expansion anchors like ribbed plastic or nylon types, gently tap the anchor into the pilot hole with a hammer until its head is flush with the drywall surface. It should be a snug fit. If it requires excessive force, your pilot hole may be too small. If it pushes in with no resistance, the hole is too large.
For self-drilling anchors, use a screwdriver or a drill on a low-speed setting to drive the anchor into the drywall until it is flush. Stop as soon as the head of the anchor meets the wall surface to avoid stripping the surrounding gypsum.
For toggle bolts, you'll pinch the wings together, push them through the larger pre-drilled hole, and wait to hear or feel them spring open behind the wall.
Step 4: Setting the Anchor and Securing the Fixture
This final step activates the anchor's mechanism.
- For Expansion Anchors: Place your fixture over the anchor, insert the provided screw, and begin to tighten it. You will feel resistance as the screw causes the anchor to expand. Tighten until the screw is snug.
- For Molly Bolts: Tighten the bolt until you feel significant resistance. This indicates the sleeve has fully expanded behind the wall. You can then remove the bolt, position your fixture, and re-drive the bolt.
- For Toggle Bolts: Pull the screw outwards slightly to ensure the toggle is braced against the back of the wall. Position your fixture and tighten the screw until it is secure.
Crucially, do not overtighten. Overtightening can strip the anchor, break the anchor head, or crush the drywall, compromising the entire installation. Tighten until the fixture is secure against the wall and does not move.
Sourcing with Confidence: The Maden.co Advantage for Industrial Buyers
Knowing how to install an anchor is only half the battle. For procurement managers, MRO buyers, and engineers, the process of sourcing the right components presents its own set of challenges: ensuring quality, verifying specifications, and managing a reliable supply chain. This is where a strategic partnership with a dedicated marketplace becomes a competitive advantage.
At Maden.co, our entire platform is built to solve these challenges. Our mission is to democratize access to American manufacturing, proving that U.S.-made components are not only superior in quality but also just as accessible and convenient as any global alternative. This is the heart of the American manufacturing revival. We connect industrial buyers directly with a network of over 800 verified U.S. manufacturers, offering a catalog of more than 2.5 million products. You can learn more about our commitment and values and how we are championing American manufacturing here.
Sourcing through our platform provides tangible benefits that impact your bottom line and operational resilience:
- Supply Chain Transparency: Every product on our marketplace is from a verified American manufacturer. This eliminates the uncertainty and risk associated with complex global supply chains, ensuring you know exactly where your components are coming from.
- Guaranteed Quality and Compliance: American manufacturing is synonymous with stringent quality control and adherence to standards. When you source a fastener through Maden.co, you can trust it meets the specified material and performance criteria, reducing the risk of premature failure.
- Reduced Procurement Friction: Instead of vetting dozens of suppliers, you have a single, trusted source. Our platform simplifies the search, comparison, and purchasing process, saving valuable time for your procurement team. If you have specific sourcing questions or need help finding a particular component, our team is ready to help.
For a procurement manager under pressure to source thousands of DIN-compliant fasteners for a new assembly line, or an MRO buyer facing an unexpected breakdown that requires a specific, hard-to-find part, the ability to quickly find, finance, and receive a verified, U.S.-made component is a game-changer. This customer empowerment is a core value we deliver every day.
Furthermore, we understand that large-scale projects and MRO purchasing can be capital-intensive. That's why we offer a strategic tool to help you manage cash flow effectively. You can apply for Instant Financing at checkout to streamline your capital-intensive projects, allowing you to secure the materials you need now without disrupting your budget.
For American manufacturers who share our commitment to industrial excellence, our platform offers a direct channel to a nationwide market of industrial buyers. Are you a U.S. manufacturer? Register as a vendor and join the American manufacturing revival.
Conclusion
The humble drywall anchor is a perfect example of how small components play a massive role in the safety, efficiency, and integrity of a commercial or industrial facility. The knowledge of how to select the right anchor for the load and install it with precision is not a trivial skill—it is a professional standard. From light-duty ribbed anchors for signage to robust nylon anchors for essential equipment, the correct choice prevents accidents, avoids costly rework, and ensures long-term reliability.
Mastering the installation process—from pre-installation checks and precise pilot hole drilling to proper anchor setting—transforms a potential point of failure into a rock-solid foundation. However, true industrial excellence goes beyond just the installation; it begins with the sourcing.
By choosing to source from a dedicated B2B marketplace like Maden.co, you are doing more than just buying a product. You are investing in a resilient American supply chain, ensuring component quality, and empowering your team with the tools they need to succeed. Explore our vast catalog of U.S.-made products and discover how a partnership with us can strengthen your operations from the ground up. Make your next procurement seamless and strategic, and take advantage of instant financing at checkout to power your most ambitious projects.
Frequently Asked Questions (FAQ)
1. Can I use a drywall anchor in a stud? No. Drywall anchors are specifically designed for use in hollow portions of the wall where no stud is present. If you hit a wood stud, you should use a wood screw of appropriate length and gauge driven directly into the center of the stud for a much stronger hold.
2. What is the most common mistake when installing drywall anchors? The most common and critical mistake is drilling the pilot hole too large. A hole that is even slightly oversized will prevent the anchor from expanding properly and gripping the drywall, dramatically reducing its weight-bearing capacity and leading to failure. Always use the exact drill bit size recommended by the anchor's manufacturer.
3. How do I know the weight capacity of a drywall anchor? The weight capacity, or load rating, is determined by the manufacturer and should always be printed on the product packaging or the technical specification sheet. This rating is typically for shear (downward) force in standard 1/2-inch drywall. For your safety margin, always choose an anchor with a load rating that is at least two to three times the actual weight of the object you plan to hang.
4. Can I remove a drywall anchor and reuse the hole? It depends on the anchor type. Expansion anchors (plastic or nylon) cannot be effectively removed without damaging the wall and are not reusable. Molly bolts are designed so that the bolt can be removed while the anchor sleeve remains securely in the wall, allowing for remounting. Toggle bolts will fall inside the wall if the screw is fully removed. In most professional settings, it is best practice to use a new anchor for any new installation.


